Máy đo MD82100-E Moduloc
Moduloc , Cảm biến Moduloc, máy dò kim loại nóng moduloc, cảm biến tia laser moduloc, thiết bị dò bằng laser moduloc
General Description
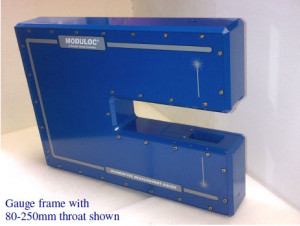
This MD82100-E Gauge is purpose built for determining the thickness of product of upto 25mm thickness on the line to an accuracy of 4 to 8 micron depending on model selected. Gauge frames with air gaps of between 80 mm and 280mm and up to 250 mm throat depth are available. Other Gauges are available with 1100 mm throat depth for determining strip centreline thickness on material of up to 2 mtrs in width.
The compact Gauge frame requires a clearance of only 100 mm in the rolling direction and thus easy to retro fit into existing lines or for replacing existing Gauge systems. The gauge configuration and throat height is similar to that of most common contact Gauges to facilitate straightforward replacement.
This Gauge utilizes Class II Laser Triangulation Meters to determine strip thickness. Thickness is calculated from the difference between the measured distance from lower and upper Lasers. These Lasers measure continuously with fast 1kHz update rate over the complete length of the passing material and hence will also detect the joint between welded coils for later removal. Furthermore, as these are Class II Lasers there is no need for a Safety Officer, nor protective measures against emitted radiation.
Any changes in the C-Frame throat dimensions are automatically compensated by auto-zeroing from a Master on a cantilever inserted into the Gauge throat prior to insertion onto the line. Whilst Isotope and X-Ray Gauges require calibration for varying alloy content in the strip, this Gauge operates independently of material make-up and density. No material parameters need be fed into the system, nor various calibration samples needed. Also, thickness noise due to crystal alignment within the strip is a thing of the past.
The Gauge is provided with built-in-fan providing air wipe to the frame viewing windows or alternatively with a remote blower for securing in a clear air environment.
The measuring rate can be set up to 2kHz, much faster than Radiometry Gauges which typically scan at a rate of 60ms. This enables the recognition of roller eccentricity which is impractical with other Gauges. This Gauge is ideal for fast Gauging control.
Thickness is displayed as a numeric value in the CPU and in graphic form with optional PC. Alarm levels for product outside of tolerance limits can be set.



 Mr Hà
Mr Hà